


Arduino Ethernet Shield 2 [A000024]
Details
- BrandArduino
- Operating Systemarduino
- CPU Model210
- Graphics Card DescriptionIntegrated
- Memory Storage Capacity1 TB
- Specific Uses For ProductEveryday Use
![Arduino Ethernet Shield 2 [A000024]](https://images-na.ssl-images-amazon.com/images/I/61x8bcPqc6L._AC_UL116_SR116,116_.jpg)
![Arduino Uno REV3 [A000066]](https://images-na.ssl-images-amazon.com/images/I/61AvdQOxFzL._AC_UL116_SR116,116_.jpg)
![Arduino Mega 2560 REV3 [A000067] – ATmega2560, 16MHz, 54 Digital I/O, 16 Analog Inputs, 256KB Flash, USB, Compatible with Arduino IDE for Advanced Projects](https://images-na.ssl-images-amazon.com/images/I/61sr9f-JppL._AC_UL116_SR116,116_.jpg)
Description
🌐 Connect, Create, Conquer: Your Arduino’s Gateway to the Internet of Things!
- MULTI DEVICE HOSTING - Serve files or sensor data to up to 8 devices simultaneously—perfect for collaborative setups.
- ONBOARD DATA STORAGE - Micro-SD slot lets you log, store, and serve data without extra hardware.
- EXPANDABLE CREATIVITY - Stack additional shields to amplify your project’s capabilities effortlessly.
- ROBUST PROTOCOL SUPPORT - Reliable TCP and UDP communication libraries power your networked applications.
- SEAMLESS ONLINE INTEGRATION - Plug & play Ethernet connectivity with Arduino for instant IoT projects.
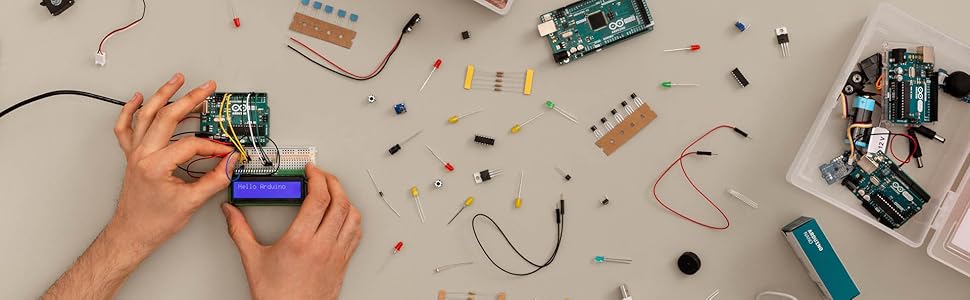
The Arduino Ethernet Shield 2 (A000024) transforms your Arduino board into a networked powerhouse with plug-and-play Ethernet connectivity. Supporting TCP and UDP protocols, it enables you to build web servers, send data to the cloud, and host up to 8 devices simultaneously. Its integrated micro-SD card slot offers onboard data storage and logging, while its stackable design allows seamless expansion with other shields—all powered directly from your Arduino board.

Specifications
| Standing screen display size | 2 Inches |
| Screen Resolution | 3840 x 2160 |
| Max Screen Resolution | 3840x2160 |
| Processor | 210 |
| RAM | 1 DDR3 |
| Memory Speed | 16 MHz |
| Card Description | Integrated |
| Wireless Type | 802.11b |
| Number of USB 2.0 Ports | 1 |
| Brand | Arduino |
| Series | A000024 |
| Item model number | A000024 |
| Operating System | arduino |
| Item Weight | 1.76 ounces |
| Product Dimensions | 3.23 x 2.28 x 1.34 inches |
| Item Dimensions LxWxH | 3.23 x 2.28 x 1.34 inches |
| Number of Processors | 1 |
| Computer Memory Type | DDR3 SDRAM |
| Flash Memory Size | 1 MB |
Have a Question? See What Others Asked
Reviews
S**N
Yup!
Works well and is reliable when you code correctly. A little bit of a learning curve with quirks you might not expect so read as much about it as possible before giving up on it.
K**E
Great for first timers like me
This was my first “shield” (what Arduino refers to its add-on boards). It worked just as expected. I was able to host a simple html webpage on my Arduino. Having just gotten into programming integrated circuits, I am pleased with how easy it was to use this. The pins all fit into my Uno without issue. The box came with informative material and was free of damage. The price point for this (and all Arduino accessories) can’t be beat.
C**T
Works great but required a lot of web searches to master
Received this shield and installed it on an Arduino Mega, I had to do quite a lot of web searching in order to figure out just what you could do with it, as there is very little support from Arduino. However, there are many hobbyists out there who came before me and I just copied some of their projects, added a few tweaks of my own, and managed to get this working. I created a micro-server that will load up a web page from the on-board SD card. Am presently working on a sketch that will allow a scrolling RSS feed to be displayed on a 16x2 LCD. All in all, a great shield, but for intermediate to advanced users. One important thing to keep in mind is that this shield works best using the Ethernet2 library. Make sure you install that first on your Arduino IDE to avoid problems.
K**P
Works Great & is super easy to use
No complaints. Works well, is made well, has a lot of tutorials, and is easily utilized
R**T
It's a great board, lacking support
Got it, played with it, and got it to work within my project. Coupled with an Arduino Mega, I decided to add a PoE module. The 5v version works fine, but the Mega has low voltage, so I ordered the 12v version. This board craps out after about a minute of having 12v applied to it, even though the Arduino.org web site specifically states it should be using the 12v module. Posting on the Arduino.org forums resulted in no help. Regardless, this is the best ethernet shield out there, hands down. Because it is a W5500, there's no fiddling with the high and low settings of certain pins to enable or disable SD card reader or ethernet like on any W5100.After a ton of research, and ordering more PoE modules, I have found that this board causes the Arduino to lock up when using any 12v PoE module. This thing has been working rock solid since figuring that out. I really can't say enough about this board. I wish it were cheaper, but even at this price it's worth every penny. PoE support, the plugs on top, the W5500 ethernet chip, the ability to write to SD while doing ethernet stuff, is key over a W5100 which is on the vast majority of ethernet shields out there.The other HUGE advantage of these boards are that they come with a MAC address. Cheap-o boards never do, so you have to make one up. These have one assigned, even though I've yet to find a way to read that MAC off of the board. What I do is create a script to write the MAC to the EEPROM, then read the MAC from the EEPROM on startup, then provide that to the Ethernet library.Today I received another one of these boards, and it is missing half the header for PoE. There's a quality control issue going on. See photo.Unfortunately, Arguino.org lacks support, so you really are on your own.
A**Z
Works as expected
It works as expected. It is connected 24/7 and sending udp packets every second without issues or disconnections . Using the standard Ethernet library .I wish it was documented better . The documentation of the shield is poor almost no documentation about the colorful header on the board and no documentation how to use the power over lan feature. The board well made and looks high quality.
S**N
My concept works thanks to arduino
I supported arduino in my first ever attempt to use microcontrollers. I bought this uno r3 and also a WiFi rev2 and a starter kit. Much of my initial work and concept would not have been possible had I not found their site about connecting two arduino over tcp client server. So it’s only fair that I return the support. Thanks
D**D
Missing ICSP (SPI) pass-through, hardwired CS pin, and connector choices prevent stacking
For people who don't want to crack out a soldering iron, a lot of Arduino shields could use some improvements, and this board is no exception. We're blessed with Mega 2560 boards that have a couple of dozen extra pins, yet half the shields out there (including this one) require board-level reworks or bending pins to move their chip select (CS) pins off of pin 10.Instead of expending board space for unnecessary connectors that provide +5, GND, and redundant copies of D5, D6, A2, and A3, why not use that extra board space for something more broadly useful, like:1. Groups of two pins per chip (with 90 degree connectors so that it doesn't interfere with the board above it), with one pin going to the chip select pin on the chip and the adjacent pin going to the Arduino output pin that normally drives it. With that small change, you could remove the jumper (preinstalled) and instantly choose a different chip select pin without any reworks.2. A group of four pins for attaching an external PoE hat, similar to how the Raspberry Pi does it.Speaking of 90-degree connectors, when you have shields, which are, by definition, designed for stacking, those I2C connectors really should be 90-degree connectors oriented in such a way that you can plug something in horizontally without it interfering with the board above it.But my biggest beef with this board is that instead of using a proper pass-through header for the ICSP (SPI) pin block, they used a normal header, without pins sticking out the other side. That means you cannot stack any board on top of this that uses SPI. And because its I2C support requires two extra pins that most other boards lack, if you want to use the I2C functionality on this board, you also cannot stack this board on top of almost any other board.So you can't put it on top of another board, and you can't put another board on top of it. Wait, what?Don't get me wrong. There are ways to work around these defects, such as using jumper wires from the opposite side of the other board to whichever pins have redundant copies of the missing signals (which varies from board to board), but having to expend all that extra effort just because somebody cut two or three cents off of the bill-of-materials cost is unconscionable.This board should be immediately re-revved, at a bare minimum, to use a proper pass-through connector for the ICSP connector like all the third-party knock-offs do. There's really no excuse for such a silly and obvious mistake in a mass-produced product. While they're at it, maybe they could make those other improvements, too?
Common Questions
Trustpilot
3 days ago
1 day ago
